25 Must-Try Iconic Japanese Dessert Ideas
Craving something sweet from Japan? This list of 25 iconic Japanese desserts has got you covered! From mochi to matcha treats, explore a delightful mix of flavors and textures that will satisfy any sweet tooth. Let’s jump right into these delicious ideas that celebrate the creativity and tradition of Japanese sweets!
Japanese desserts are a delightful mix of tradition and creativity, showcasing unique flavors and beautiful presentations. From classic sweets like mochi and dorayaki to modern treats like matcha tiramisu, there’s something to satisfy every sweet tooth. Ready to get inspired? Here are 25 iconic Japanese dessert ideas to add a little sweetness to your day!
Kakigori Shaved Ice Treat
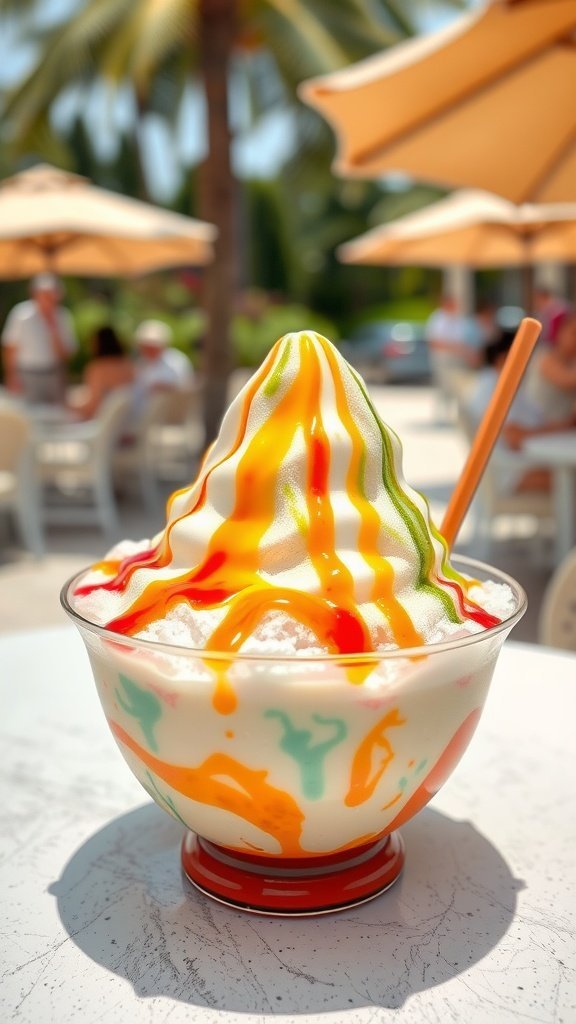
Kakigori is a delightful Japanese treat that brings a refreshing twist to hot summer days. This fluffy, finely shaved ice is often topped with vibrant syrups, sweetened condensed milk, and sometimes even fruit or mochi. The combination of textures and flavors creates a fun experience that’s both cool and satisfying.

Making Kakigori is simple and can be done at home with just a few ingredients. It’s a great way to get creative with toppings and flavors, allowing you to customize your treat to your liking!
Ingredients
- 2 cups ice cubes
- 1/2 cup flavored syrup (like strawberry, green tea, or melon)
- 1/4 cup sweetened condensed milk
- Optional toppings: fresh fruits, mochi, or red bean paste
Instructions
- Shave the Ice: Use a manual or electric ice shaver to shave the ice cubes into a fluffy mound.
- Prepare the Base: Place the shaved ice into a bowl or cup.
- Add Toppings: Drizzle the flavored syrup over the ice, then add sweetened condensed milk for richness.
- Garnish: Top with your choice of fresh fruit, mochi, or red bean paste for extra flavor and texture.
- Serve & Enjoy: Grab a spoon or straw and dig in while it’s cold!
Matcha Green Tea Cake
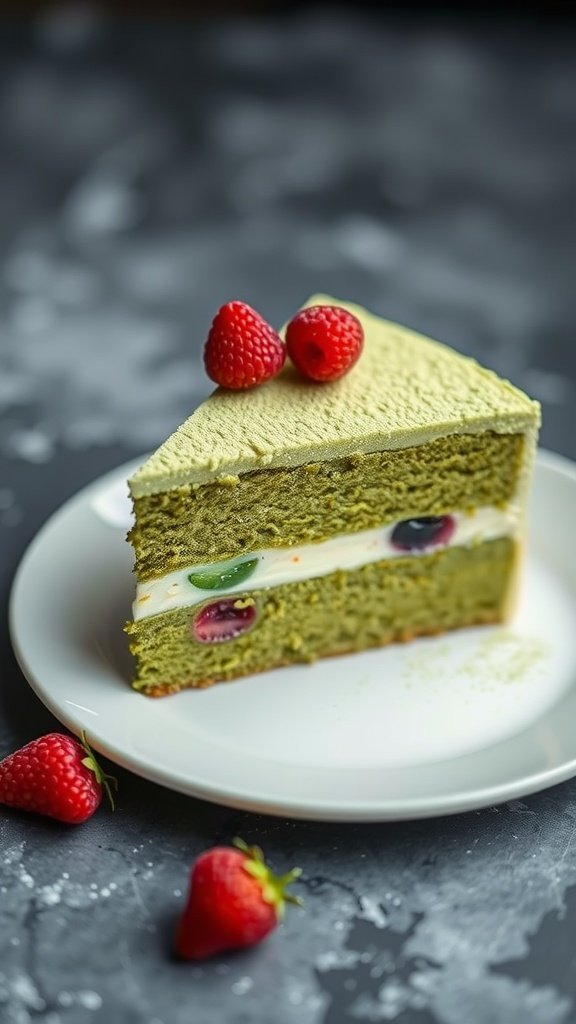
Matcha green tea cake is a delightful treat that combines rich flavors with a light, fluffy texture. The earthy taste of matcha paired with creamy frosting makes this cake unique and satisfying. It’s a simple dessert to whip up, perfect for both special occasions and casual gatherings.
This cake is not overly sweet, allowing the matcha flavor to shine through. The vibrant green color is eye-catching, and the addition of fresh fruits like strawberries adds a refreshing touch. Whether you’re a matcha lover or new to it, this cake is sure to impress!
Ingredients
- 1 cup all-purpose flour
- 1/2 cup granulated sugar
- 1 teaspoon baking powder
- 1/4 teaspoon salt
- 1/4 cup unsalted butter, softened
- 2 large eggs
- 1/4 cup milk
- 2 tablespoons matcha green tea powder
- 1 teaspoon vanilla extract
- 1 cup heavy cream
- 2 tablespoons powdered sugar
- Fresh berries for decoration
Instructions
- Preheat the oven to 350°F (175°C) and grease an 8-inch round cake pan.
- In a mixing bowl, combine flour, sugar, baking powder, and salt. Add butter, eggs, milk, matcha powder, and vanilla. Mix until smooth.
- Pour the batter into the prepared cake pan and bake for 25-30 minutes, or until a toothpick comes out clean.
- Let the cake cool in the pan for 10 minutes, then transfer to a wire rack to cool completely.
- Whip the heavy cream with powdered sugar until soft peaks form. Frost the cooled cake with whipped cream and top with fresh berries.
Taiyaki Fish-Shaped Pastries
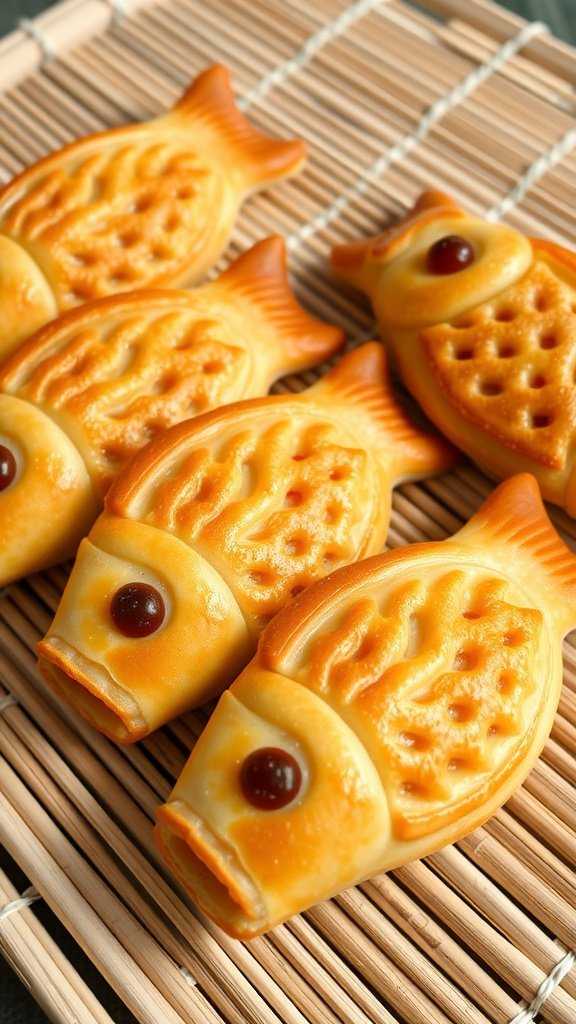
Taiyaki is a delightful Japanese treat, shaped like a fish and often filled with a variety of sweet fillings. The pastry is crispy on the outside and soft on the inside, bringing together a perfect blend of textures and flavors. Popular fillings include red bean paste, custard, chocolate, and even sweet potato, making it a versatile dessert that can cater to different tastes.
Making taiyaki at home is quite simple and fun! With a specialized fish-shaped mold, you can whip up these pastries in no time. They are perfect for sharing, making them a hit at gatherings or as a special treat for yourself. Let’s dive into the recipe!
Ingredients
- 1 cup all-purpose flour
- 1 tablespoon sugar
- 1 teaspoon baking powder
- 1/2 cup milk
- 1 large egg
- 1/4 cup melted butter
- 1 cup red bean paste (or your choice of filling)
- Cooking oil (for greasing the mold)
Instructions
- Mix Dry Ingredients: In a bowl, combine the flour, sugar, and baking powder.
- Add Wet Ingredients: In another bowl, whisk together the milk, egg, and melted butter. Combine the wet and dry ingredients until just mixed.
- Preheat the Mold: Heat your taiyaki mold over medium heat and lightly grease it with cooking oil.
- Fill the Mold: Pour a small amount of batter into the mold, add a spoonful of red bean paste, then cover with more batter.
- Cook: Close the mold and cook for about 3-4 minutes on each side, or until golden brown.
- Serve: Remove the taiyaki from the mold, let them cool slightly, and enjoy!
Anmitsu Gelatin Dessert
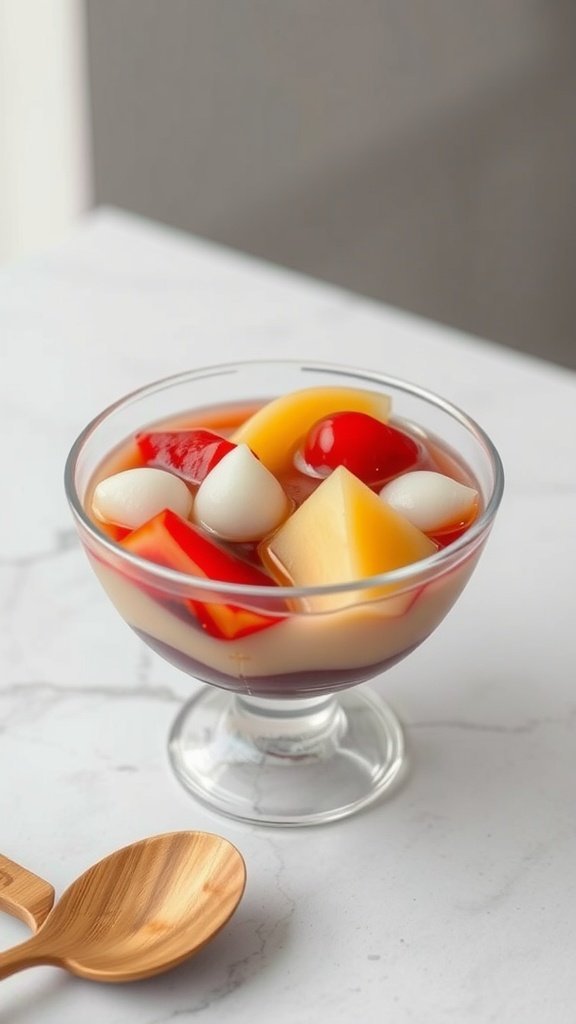
Anmitsu is a delightful Japanese dessert that combines sweet flavors and refreshing textures. This chilled treat features a mix of agar jelly, fresh fruits, and sweet red bean paste, making it a perfect palate cleanser after a savory meal or a light dessert on a warm day. The contrast of the soft jelly with the chewy mochi and the sweetness of the fruit creates a satisfying experience that is both simple to make and enjoyable to eat.
This dessert is not only visually appealing but also versatile. You can customize it with your favorite fruits and toppings, allowing for endless variations. Whether you stick to traditional ingredients or get creative, Anmitsu is sure to impress!
Ingredients
- 1 cup agar agar powder
- 4 cups water
- 1/2 cup sugar
- 1/4 cup sweet red bean paste (anko)
- 1 cup mixed fruits (like peaches, strawberries, and mandarins)
- 1/2 cup mochi balls
- 1 cup fruit syrup (for drizzling)
Instructions
- Prepare the Agar Jelly: In a pot, combine agar agar powder and water. Bring it to a boil while stirring. Once boiling, reduce heat and simmer for about 5 minutes. Add sugar and stir until dissolved.
- Setting the Jelly: Pour the mixture into a shallow container and let it cool until set, about 1-2 hours in the refrigerator.
- Cut the Jelly: Once set, cut the agar jelly into cubes.
- Assemble the Dessert: In serving bowls, layer the agar jelly cubes, mixed fruits, and mochi balls. Top with a dollop of sweet red bean paste.
- Finish with Syrup: Drizzle fruit syrup over the top before serving. Enjoy your delicious Anmitsu!
Dorayaki Pancakes with Red Bean Filling
Dorayaki pancakes are a beloved Japanese treat that combines two fluffy pancakes with a sweet red bean filling, often called “anko.” These delightful sweets are soft, slightly chewy, and have a hint of sweetness that perfectly complements the earthy flavor of the red bean paste. They are not only delicious but also fun to make, making them a great choice for both novice and experienced bakers.
The pancakes are simple to whip up, needing just a few ingredients like flour, eggs, and sugar. Once cooked, they are filled with the sweet red bean paste, creating a delightful dessert that’s perfect for any occasion. Enjoy them fresh for breakfast or as a snack throughout the day.
Ingredients
- 1 cup all-purpose flour
- 1/2 cup granulated sugar
- 2 large eggs
- 1/2 cup milk
- 1 teaspoon baking powder
- 1 cup sweet red bean paste (anko)
- 1 tablespoon vegetable oil (for cooking)
Instructions
- In a bowl, whisk together the flour, sugar, and baking powder. In another bowl, beat the eggs and mix in the milk.
- Combine the wet and dry ingredients, stirring until just mixed. The batter should be smooth.
- Heat a non-stick pan over medium heat and lightly grease it with vegetable oil.
- Pour about 1/4 cup of batter onto the pan for each pancake. Cook until bubbles form on the surface, then flip and cook for another minute or until golden brown.
- Repeat until all batter is used. Stack the pancakes and let them cool slightly.
- To assemble, spread a generous spoonful of red bean paste between two pancakes, creating a sandwich. Serve warm or at room temperature.
Mochi Ice Cream Varieties

Mochi ice cream is a delightful fusion of traditional Japanese mochi and creamy ice cream. This dessert features a chewy rice cake exterior that wraps around a scoop of ice cream, creating a unique texture and flavor experience. The combination of sweet, ice-cold ice cream and the soft, stretchy mochi is simply irresistible, making it a popular treat for warm days or special occasions.
Making mochi ice cream at home can be quite simple! With just a few ingredients, you can customize flavors and sizes to your liking. Whether you prefer classic flavors like vanilla and chocolate or want to experiment with exotic options like matcha or mango, the possibilities are endless.
Ingredients
- 1 cup glutinous rice flour
- 1/4 cup granulated sugar
- 1 cup water
- Ice cream of your choice (about 2 cups)
- Potato starch (for dusting)
Instructions
- Prepare the Mochi Dough: In a microwave-safe bowl, mix glutinous rice flour and sugar. Add water and stir until smooth. Cover with plastic wrap and microwave for 1 minute. Stir, then microwave for another minute. Stir again and microwave for a final 30 seconds until the mixture is sticky and translucent.
- Shape the Mochi: Dust your work surface with potato starch. Transfer the mochi dough onto the surface and let it cool slightly. Divide the dough into small portions and flatten each piece into a circle.
- Fill with Ice Cream: Scoop ice cream into the center of each mochi circle. Quickly wrap the dough around the ice cream, sealing it tightly. Place the finished mochi on a parchment-lined baking sheet.
- Freeze: Pop the baking sheet in the freezer for about 2 hours, or until the mochi is firm. Enjoy your homemade mochi ice cream!
Daifuku Rice Cake Variations
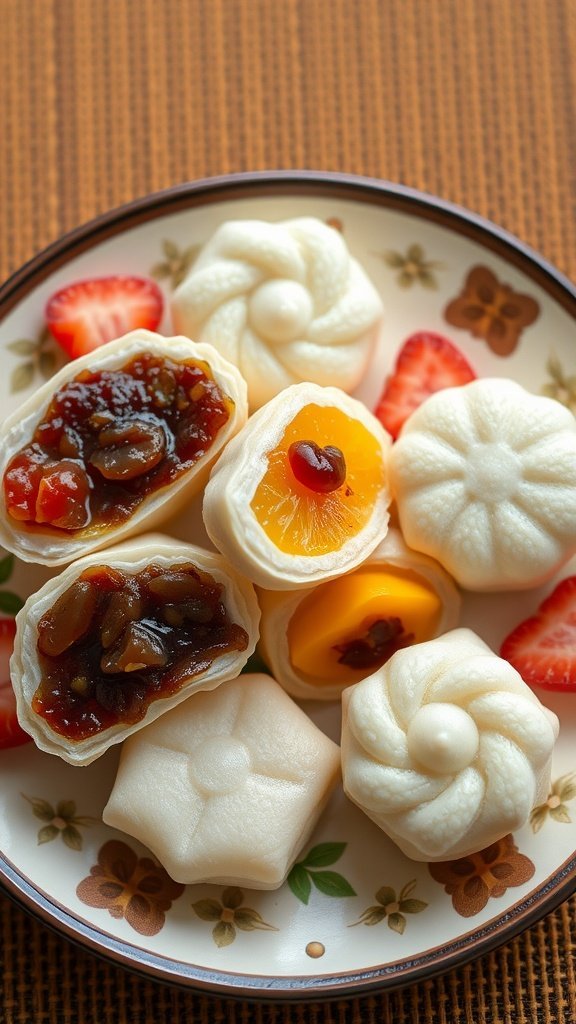
Daifuku is a delightful Japanese treat made from glutinous rice flour, giving it a chewy texture that many love. These little rice cakes are often filled with sweet pastes, fruits, or other flavorful fillings, making them a versatile dessert option. The taste is a perfect balance of sweet and subtle, allowing the various fillings to shine.
Making daifuku at home is surprisingly simple and can be a fun activity for any dessert lover. You can get creative with flavors and fillings, customizing them to suit your taste. Whether you prefer the classic red bean paste or want to experiment with fresh fruits, there’s a daifuku variation for everyone.
Ingredients
- 1 cup mochiko (sweet rice flour)
- 1/4 cup sugar
- 1/2 cup water
- Potato or corn starch (for dusting)
- Fillings: anko (sweet red bean paste), fresh fruit (like strawberries or mango), or ice cream
Instructions
- Mix Ingredients: In a microwave-safe bowl, combine mochiko, sugar, and water. Stir until smooth.
- Microwave: Cover the bowl with plastic wrap and microwave for about 2 minutes. Stir, cover again, and microwave for an additional 1-2 minutes until the mixture is slightly translucent.
- Cool and Shape: Let the dough cool for a few minutes. Dust your hands and surface with potato or corn starch to prevent sticking. Pinch off small pieces, flatten them, and place your chosen filling in the center.
- Wrap and Seal: Gently fold the edges over the filling and pinch to seal. Roll into a ball and dust with more starch to avoid stickiness.
- Serve: Enjoy your homemade daifuku fresh or chill them in the fridge for a refreshing treat!
Yaki Imo Roasted Sweet Potatoes

Yaki Imo, or roasted sweet potatoes, is a beloved Japanese treat that’s simple to make and bursting with natural sweetness. These tender, caramelized gems are perfect for snacking and have a delightful, creamy texture. They’re often enjoyed warm, making them a popular choice in colder months.
The flavor profile is rich and comforting, with a subtle sweetness that shines through with each bite. Cooking them is incredibly straightforward, requiring minimal ingredients and effort—just sweet potatoes and a little patience as they roast to perfection.
Ingredients
- 4 medium-sized Japanese sweet potatoes
- Aluminum foil
Instructions
- Preheat the Oven: Start by preheating your oven to 400°F (200°C).
- Prepare the Sweet Potatoes: Wash the sweet potatoes thoroughly to remove any dirt. Pat them dry with a towel.
- Wrap in Foil: Wrap each sweet potato in aluminum foil. This helps to steam them as they roast, enhancing their natural sweetness.
- Bake: Place the wrapped sweet potatoes directly on the oven rack or on a baking sheet. Bake for about 45-60 minutes, or until they are tender when pierced with a fork.
- Serve: Remove from the oven, unwrap the foil, and let them cool for a few minutes. Enjoy warm as is, or with a sprinkle of salt or a drizzle of honey for an extra treat.
Sakura Mochi Cherry Blossom Rice Cakes
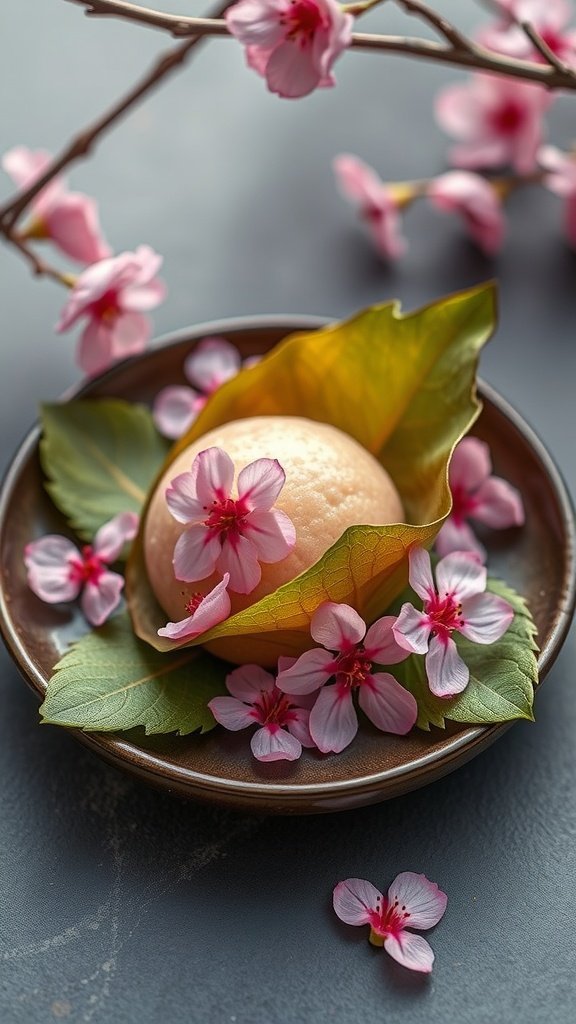
Sakura Mochi are delightful Japanese rice cakes that celebrate the beauty of cherry blossoms. These sweet treats have a soft, chewy texture and a subtle sweetness that perfectly complements the floral aroma of the cherry blossoms. They’re often enjoyed during Hanami, the tradition of cherry blossom viewing, making them not just a dessert but a lovely seasonal experience.
Making Sakura Mochi is quite simple and a fun activity for any home cook. With just a few ingredients, you can create these charming cakes that not only taste good but also look beautiful on any plate. They are a great way to bring a touch of spring into your kitchen!
Ingredients
- 1 cup sweet rice flour (mochi flour)
- 1/4 cup sugar
- 1 cup water
- 1/2 teaspoon salt
- 10-12 cherry blossom leaves, salted
- Red bean paste (anko) for filling
- Food coloring (optional)
Instructions
- Prepare the Mochi Dough: In a bowl, mix sweet rice flour, sugar, and salt. Gradually add water, stirring until smooth. If you want to add color, mix in a few drops of food coloring.
- Steam the Mixture: Pour the mixture into a steaming dish lined with parchment paper. Steam for about 20 minutes until the dough is shiny and cooked through.
- Shape the Mochi: Once cooled, wet your hands and take small portions of the mochi dough. Flatten each piece and place a small amount of red bean paste in the center. Fold the dough around the filling and shape it into a ball.
- Wrap with Leaves: Take a salted cherry blossom leaf and wrap it around each mochi ball. This adds a nice flavor and enhances the presentation.
- Serve: Enjoy your Sakura Mochi fresh, or refrigerate for a few hours before serving to let the flavors meld.
Kushi Dango Skewers
Kushi Dango are delightful Japanese rice dumplings that are not only fun to eat but also simple to make. These sweet treats are often enjoyed during festivals and are known for their chewy texture and vibrant colors. Drizzled with a sweet soy sauce glaze, they offer a unique blend of flavors that’s both satisfying and refreshing.
Making Kushi Dango at home is a straightforward process, requiring just a few ingredients. It’s a perfect recipe to involve kids in the kitchen, as they can help shape the dumplings and assemble the skewers. Serve them as a snack or dessert, and watch everyone enjoy these colorful bites!
Ingredients
- 2 cups glutinous rice flour
- 1/2 cup sugar
- 1 cup water
- Food coloring (red, yellow, green)
- 1/4 cup soy sauce
- 1/4 cup mirin (Japanese sweet rice wine)
- 2 tablespoons cornstarch (for dusting)
- Skewers (for serving)
Instructions
- Prepare the Dough: In a bowl, mix the glutinous rice flour and sugar. Gradually stir in water until a smooth dough forms.
- Divide and Color: Divide the dough into three portions. Add a few drops of food coloring to each portion and knead until evenly colored.
- Shape the Dumplings: Roll each colored dough into small balls, about 1 inch in diameter.
- Boil the Dumplings: Bring a pot of water to a boil. Gently add the dumplings and cook for about 5-7 minutes until they float to the top. Remove and let cool.
- Make the Glaze: In a small saucepan, combine soy sauce and mirin. Heat until slightly thickened, then remove from heat.
- Assemble Skewers: Thread the cooled dumplings onto skewers, alternating colors. Drizzle with the soy sauce glaze before serving.
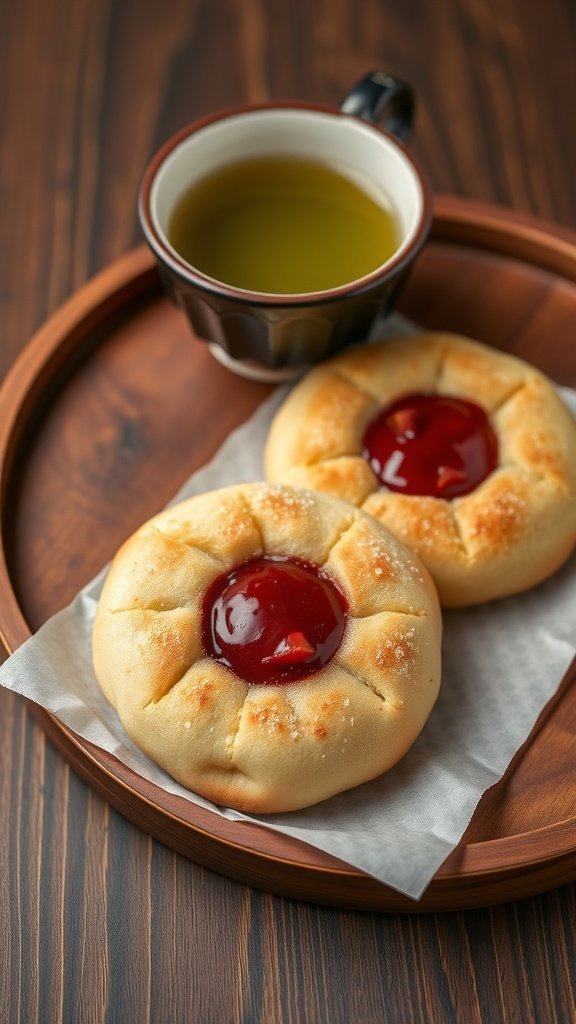
Fruit Tarts with Japanese Flair
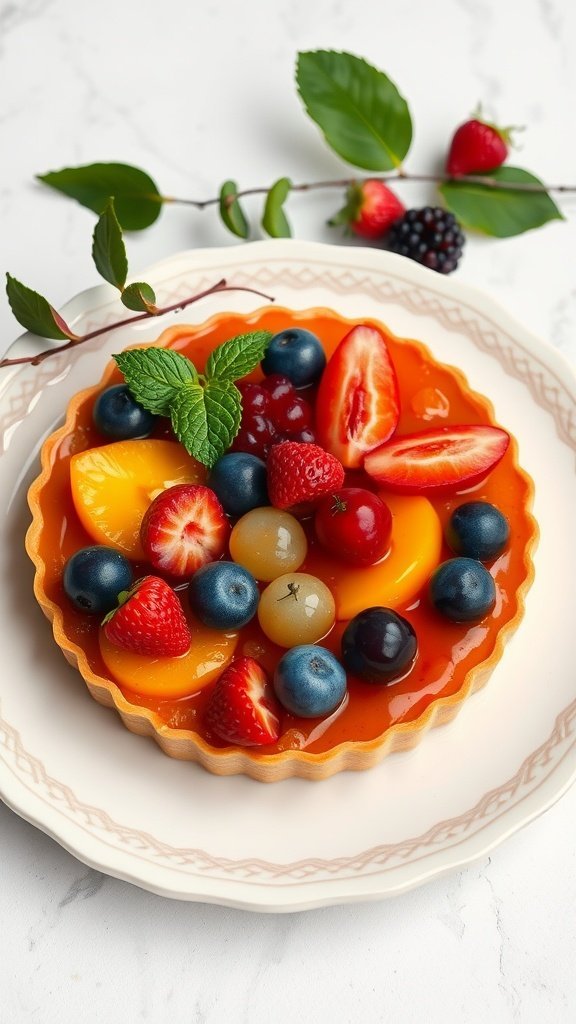
Fruit tarts with a Japanese twist are a delightful way to enjoy seasonal fruits. These tarts are typically made with a crisp and buttery crust filled with rich pastry cream or a light mousse, topped with a vibrant array of fresh fruits. The balance of sweetness from the fruits and the creamy filling creates a refreshing treat that’s perfect for any occasion.
Making these tarts is simple and rewarding. You can easily customize them with your favorite fruits, making each tart unique. The combination of flavors and textures will impress anyone who tries them!
Ingredients
- 1 ½ cups all-purpose flour
- ½ cup powdered sugar
- ½ cup unsalted butter, softened
- 1 large egg yolk
- 1 teaspoon vanilla extract
- 1 cup pastry cream or whipped cream
- 2 cups assorted fresh fruits (strawberries, blueberries, peaches, etc.)
- 1 tablespoon gelatin (optional, for glaze)
- 2 tablespoons fruit juice (for glaze)
Instructions
- Make the Tart Shell: In a bowl, mix flour and powdered sugar. Cut in butter until mixture resembles coarse crumbs. Stir in egg yolk and vanilla until dough forms. Press into a tart pan and chill for 30 minutes.
- Bake the Shell: Preheat the oven to 350°F (175°C). Bake the tart shell for 15-20 minutes until golden. Let it cool completely.
- Prepare the Filling: Fill the cooled tart shell with pastry cream or whipped cream, smoothing it out evenly.
- Arrange the Fruits: Slice and arrange your choice of fresh fruits on top of the filling in a decorative pattern.
- Make the Glaze: If using, dissolve gelatin in warm fruit juice and brush over the fruits to give them a shiny finish.
- Chill and Serve: Refrigerate the tart for at least 1 hour before serving for a refreshing treat.
Custard Cream Puffs

Custard cream puffs, or “choux a la creme,” are delightful treats filled with sweet, creamy custard. These airy pastries have a light, crispy exterior and a rich, smooth filling that creates a perfect balance of textures. They’re a favorite in Japanese desserts, often enjoyed with tea or as a light snack.
This recipe is simple enough for anyone to try, even if you’re new to baking. Once you master the choux pastry, you can fill these puffs with different flavors of custard or cream, making them versatile and fun to make!
Ingredients
- 1 cup water
- 1/2 cup unsalted butter
- 1 cup all-purpose flour
- 1/4 teaspoon salt
- 4 large eggs
- 2 cups whole milk
- 1/2 cup granulated sugar
- 1/4 cup cornstarch
- 4 large egg yolks
- 1 tablespoon vanilla extract
- 1/4 cup unsalted butter (for custard)
Instructions
- Make the Choux Pastry: In a saucepan, bring water and butter to a boil. Add flour and salt, stirring until the mixture forms a ball. Remove from heat and let cool slightly. Beat in eggs one at a time until smooth.
- Pipe the Dough: Preheat your oven to 400°F (200°C). Use a piping bag to pipe small rounds of dough onto a baking sheet. Bake for 20-25 minutes until golden and puffed up. Allow to cool completely.
- Prepare the Custard: In a saucepan, heat milk. In a bowl, whisk together sugar, cornstarch, and egg yolks. Gradually whisk in hot milk, then return to heat. Stir until thickened. Remove from heat, add vanilla and butter, and let cool.
- Fill the Puffs: Once the custard has cooled, use a piping bag to fill each choux pastry with the custard. Dust with powdered sugar before serving.