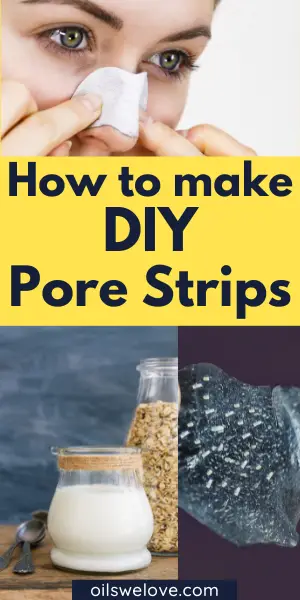
DIY Guide to Effective Homemade Pore Strips
Embarking on a journey towards cleaner, more refined pores doesn’t necessarily require a trip to the dermatologist or costly skincare products. You can achieve excellent results right at your kitchen sink, using easy-to-find and natural ingredients. This guide will walk you through creating homemade pore strips using unflavored gelatin and milk, simple items that you probably have on hand. Alongside this, you’ll need a brush and a microwave-safe bowl to prepare and apply the mask efficiently. Not only will we delve into each element’s function but we will also explain the preparation, application, aftercare, and storage procedures, shedding light on all aspects of this cost-effective and skin-friendly DIY process.
What you will need to make Homemade Pore Strips
The primary ingredients to make homemade pore strips include unflavored gelatin, milk, and the usage of regular applicators such as a brush and a microwave-safe bowl. Each component plays a key role in the effectiveness of the finished product.
- Unflavored gelatin: acts as the primary component that makes the pore strip. The beauty of unflavored gelatin is that when it cools down after being heated, it forms a strong, sticky substance that can be used to adhere to the face, bind to the dirt and sebum plugged in your pores, and then peel off to provide a deep cleanse.
- Milk: is added to unflavored gelatin to create a paste-like mixture. Milk in this pore strip recipe not only helps in achieving the desired consistency for an easy application but also brings its own natural benefits. Milk is rich in lactic acid, which functions as a gentle exfoliant, helping to remove dead skin cells and reduce the adhesion of blackheads and whiteheads to the skin.
- A brush: is used to apply the mixture on the face. Generally, it’s a good idea to use a facial brush or makeup brush that’s fine enough to apply the mixture evenly across your face, but avoid expensive or treasured brushes, as the gelatin mixture can be difficult to remove completely.
- The microwave-safe bowl: is where you mix and heat the pore strip formula. It’s important to heat the mixture so all the ingredients melt together and can be applied seamlessly. The bowl must be microwave-safe, as other types of bowls could crack or break when exposed to the temperatures inside a microwave.
These ingredients and materials collectively help in the creation of DIY pore strips that can effectively clean out your pores, leading to clearer and more refined skin.


Preparing the Pore Strip Mixture
To make your homemade pore strips, start by gathering the necessary ingredients. These include:
- 1 tablespoon of unflavored gelatin
- 2 tablespoons of milk
- A microwave-safe bowl
First, combine the gelatin and milk in the microwave-safe bowl. Stir the mixture until it’s fully blended. You’ll likely notice a chunky texture, which is indicative of a good mixture.
Next, microwave the mixture for about 10 seconds. Be careful not to overheat it; too much heat can denature the proteins in the gelatin, rendering it less effective.
After heating, let the mixture cool for a minute or two. It should still be slightly warm, but not to the point of causing burns when applied to your skin.
How to apply DIY Pore Strips
To use your homemade pore strips, follow the steps below.
First, cleanse your face thoroughly, focusing on the nose area. This is where blackheads can be particularly prevalent.
After cleansing, pat your face dry, then dampen your nose with a bit warm water. This makes your skin more receptive to the stripping process.
Now, apply the homemade gelatin strip while it’s still warm. Use a clean makeup brush or your fingers for application. Spread it across your nose or any area where you notice blackheads. Don’t apply it too close to your eyes or mouth.
Let the gelatin strip dry on your skin, which will typically take around 15 minutes. Once it’s dry, it should feel stiff to the touch.
Gently peel off the gelatin strip from your skin, pulling upwards. This motion should help dislodge the blackheads from your pores.
Finally, rinse your face to remove any residual gelatin and pat your skin dry. Follow up with a mild moisturizer.
 Do’s and Don’ts
For effective results and safe usage, keep the following do’s and don’ts in mind.
Do:
- Use the strips on a regular basis for the best results, depending on how frequently you experience blackheads.
- Always cleanse your face before applying the strip to remove oil and grime.
- Test the temperature of the mixture before applying it to your face to avoid burns.
Don’t:
- Do not apply the strip on sunburned, irritated, or sensitive skin.
- Avoid using the strips too frequently, as this can lead to skin irritation over time. The appropriate frequency depends on your skin type, but generally once a week is sufficient.
- Don’t pull off the strip too hastily as it can hurt your skin. Always peel it off gently and slowly.
Storing the Leftover Mixture
If you’ve made a larger batch of the pore strip mixture and found yourself having leftovers, it’s important to store it properly for future usage.
Put the leftover mixture into a sterile, airtight container. It can then be stored in the refrigerator to help keep it fresh and stop it from drying out. Ensure that the seal on the container is completely closed each time you use the mixture to prevent any bacteria from contaminating the mixture.
Before using the stored mixture again, always check for any changes in color, smell, or texture. If you notice anything unusual, it would be safer to dispose of the mixture and prepare a fresh batch. Properly stored mixture can last up to 5-7 days in the refrigerator, but avoid keeping it longer than this time period.
Keeping your skin healthy and fresh does not end after the application of the pore strips. Regular skin care with proper cleansing, toning, and moisturizing will help keep your skin in good condition. And when it comes to making homemade pore strips, remember to make and store them correctly to ensure they always work effectively.